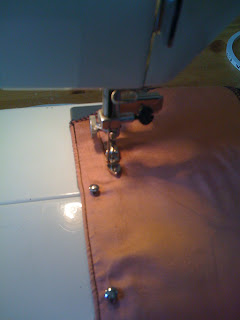
 Now take the busk out again. Do not remove the pins.
You now need to sew an edge seam. which is located just an 1/8 inch (2mm) of the edge of the fabric piece. do not sew where the hooks are to be placed.
The next two pictures will make clear the exact placement of this seam.

 Notice in the above picture. The right patern piece can be sewed in a single continuous seam.
Now this has all been preparation, now we are going to place the actual busk.
First insert the left busk piece (with the hooks) and pin in place.
Place the right pattern piece next to it.

Now take a pencil and mark through the holes in the hooks the spot where the corresponding right busk pins need to come.

Take a sharp pointy device (awl) and pierce throught the markings on the right fabric piece.
Only pierce the top layer and not the lining. Do not punch or cut the holes!
By using an awl, you'l create the hole without cutting any threads in the fabrics.


Once you have pierced all the holes like the picture above, simply insert the right busk piece and gently force the pins through.
 Pin the right busk in place.
Now it is time to permanently fix the busk into place. we need to place a seam on the position of the pins. I personally find this the most trickiest seam when making a corset.
On this specific piece I tried seven attempts before getting a satisfactory result.
When you try sewing this seam use a blind/hidden zipper foot. You need to sew as close to the busk as possible to get a nice result. and remember les stops equals better results.
Notice in the following picture I use a different sewing machine for this action. Since my industrial sewing machine does not have a zipper foot.

Sew both left and right busk into place.
 You have now succesfully inserted a busk, congratulations!
That was the hard part.
Let's continue...


This is very helpful;thank you!
ReplyDeleteInstead of pinning the busks in place before sewing, I hand-basted them in place. It holds them securely, and you get a cleaner seam the first try. You also don't have to stop to remove pins.
ReplyDeleteThis is fantastically helpful. Thanks for putting this tutorial together!
ReplyDeleteGreat work :)) Thanks for sharing..
ReplyDelete